It’s easy to lose control of your inbox knowing Gmail’s powerful search can always bail you out. But it’s way more efficient to not let the clutter build up in the first place. One of the best ways to keep your inbox in line is to take advantage of Multiple Inboxes, an “experimental” feature that has been kicking around Gmail Labs for years. This add-on automatically sorts messages into designated sub-inboxes, or panes, based on rules you create. Here’s how to set it up.
1. Disable Gmail’s tab system
If you’re using Gmail’s automatic tab system, you’ll need to disable it for Multiple Inboxes to work. To do this, log in to your Gmail account, click the gear icon, and select Configure inbox. In the next window, uncheck the Social, Promotions, Updates, and Forums options and click Save.
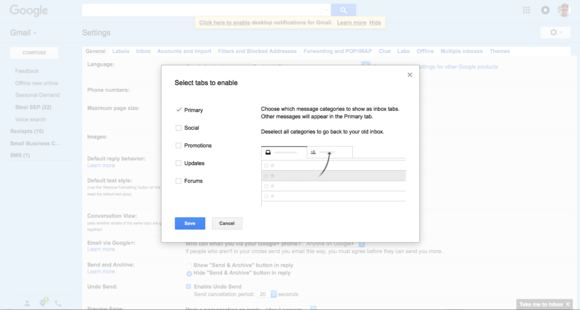
You must disable Gmail’s automatic tab system before you can use Multiple Inboxes.
2. Enable Multiple Inboxes
Once you’ve disabled the tab system, return to Settings, and select the Labs tab. Scroll down to Multiple Inboxes and check the Enable radial button. Scroll to the bottom of the page and click on Save Changes.
Your inbox will reload, and you’ll see that Gmail has pulled your starred messages and your drafts into their own panes and stacked them on top of your primary inbox. Now you’ll want to customize your new inboxes and what you want to receive in each of them.
3. Configure your new inboxes
Select the gear icon again—it will be further down the page above your primary inbox—to get back to Settings. Select the new Multiple Inboxes tab.
Under the heading Current searches for the multiple inboxes you’ll see you can configure five additional panes. You’ll need to define what you want to appear in each inbox by creating a search query for it. For example, you can have particular organizational labels placed in their own panes by entering is:label-name in each search query field (Note: Use hyphens in place of spaces between words). Or you can have have all emails from a particular sender appear in its own inbox by entering from:[sender’s email address]. It’s a good idea to keep a list of Gmail’s advanced search operators handy during this part of the setup.
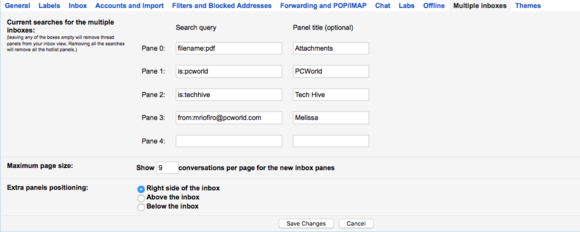
Create search queries to configure what you want to appear in each sub-inbox.
You can also enter a name for each inbox in the Panel Title field.
With your extra inboxes configured, you’ll need to tell Gmail how you want them displayed. First set the message display limit for each inbox by entering a number in the Maximum Page Size field. Then choose where you want the new panes placed—above, below, or to the right of your primary inbox. Don’t forget to click Save Changes at the bottom of the page when you’re done.
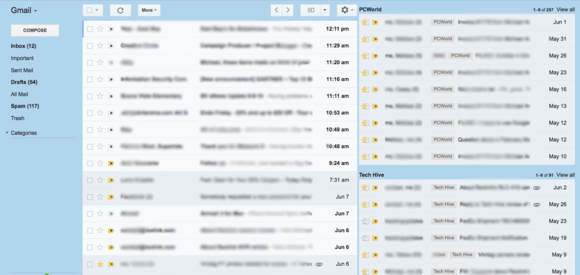
You can have your new panes appear above, below, or to the right of your primary inbox.
Whether you use it for simple inbox organization or as part of a more comprehensive email productivity plan like GTD, the Multiple Inboxes feature will help you and your inbox work smarter.